


October 6th, 2025
The answer most of you need right now: metal trays with powder coating and laser etching deliver the best durability at $40-60. They ship in three weeks and won't scratch like UV-printed alternatives that users report failing within a month.
We get the "Google results are total crap" frustration. You're looking for straightforward answers about custom trays, rather than wading through vendor pages that all offer the same vague information.
We're cutting through that noise with clear explanations of what actually works. You'll get material performance data, print method trade-offs, and trust verification steps.
Want to skip the research and get a quality tray that checks all the boxes? Our Mood Rolling Tray delivers the metal construction and durable finish this guide recommends.
Explore our bestsellers

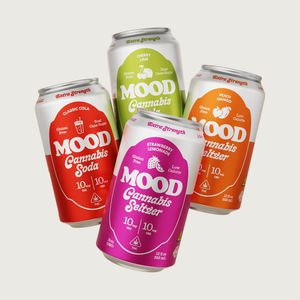
Pluto
From $17.00

15mg Delta 9 THC Gummies
From $19.00

Sleep Gummies
From $29.00

Rapid Onset Delta 9 THC Gummies
From $29.00

Kush Mintz
From $16.00

Wonder Bread
From $16.00

THCa Moonrocks
From $10.64/g

50mg Delta 8 Gummies
From $39.00
Table of Contents
What Works Best for Custom Rolling Trays (and Why)
Metal vs Melamine vs Glass (Real Durability Data)
Getting Your Design on Without It Scratching Off
File Prep That Actually Works First Time
Lip Height and Compartments That Prevent Spills
Finding Legitimate Custom Tray Printers (Not Scams)
Real Costs and Production Timelines
Getting That Glass-Smooth Finish Without the Sticky Mess
Cleaning Methods That Won't Ruin the Finish
Complete Sets and Gift Combinations
Order Your Perfect Tray Today
What Works Best for Custom Rolling Trays (and Why)
Users define success with three words: no stick, no chip, no spill. Metal with proper coating delivers on all three.
It maintains surface slickness that lets herb slide easily without clinging. It resists scratching from metal grinders and tools.
The weight keeps the tray stable when you're working. Here's what most buyers miss: material and finish aren't separate choices.
The Material-Finish System
Your base material determines which finish options will actually last. Metal enables powder coating that bonds at the molecular level.
This creates a surface that can take daily scraping without showing wear. Polymer bases require different sealing approaches.
Wood demands film finishes that create a hard protective shell. Some users report these turn gummy over time if not applied correctly.
Explore our categories


Metal vs Melamine vs Glass (Real Durability Data)
Metal Tray Advantages
Metal trays resist scraping from grinders and cards without showing surface damage. They tolerate alcohol-based cleaning without degrading.
They maintain their shape under normal use. The weight also helps keep the tray put on your lap or table instead of sliding around.
Melamine Trade-Offs
Melamine offers a lower cost, but it comes with trade-offs that users quickly discover.
Community reports consistently mention UV prints on melamine scratching within weeks of daily use.
The lighter weight means the tray shifts more easily during rolling. This becomes frustrating when you're trying to work precisely.
Glass Considerations
Glass provides that premium look and cleans easily with any solvent. Fragility becomes a real concern if you're using your tray in outdoor or social settings.
One drop ends the investment. This makes glass better suited for stationary home use.
Why Users Say "No Plastic or Wood"
We see this requirement constantly because buyers have learned from experience. Plastic trays often feel cheap and show wear quickly.
Wooden trays require proper finishing knowledge that most sellers skip to save costs.
When you see "no plastic or wood" in user posts, they're essentially saying they want durability without the maintenance headaches that come with it.
Real Wear Timelines You Can Expect
UV prints on melamine degrade in weeks of regular use based on multiple user reports.
People describe graphics that looked sharp on delivery but showed scratching and fading within a month of daily scraping.
Powder-coated metal maintains its appearance for years under the same conditions. The coating is baked onto the metal surface at high temperatures.
Our Mood Rolling Tray uses this exact metal construction approach. You get the durability advantage without requiring custom order minimums or long production waits.
Hemp and polymer alternatives exist but receive minimal interest in user discussions.
Functional performance trumps sustainability credentials in actual purchase decisions.
Want to learn more about hemp-derived cannabis? Check out our guide on how to purchase weed legally online.
Getting Your Design on Without It Scratching Off
The customization method determines whether your artwork will last years or disappear in weeks.
Each method pairs with specific materials.
UV Printing on Melamine or Metal
UV printing sprays ink directly onto the surface and cures it with ultraviolet light. It works on melamine and some metal surfaces.
It delivers full-color prints with photo-quality detail. The problem shows up with daily use.
Multiple users report that UV prints scratch quickly when scraped with cards or metal tools. This is exactly the normal wear a rolling tray experiences.
Sublimation on Powder-Coated Surfaces
Sublimation transfers ink into powder-coated surfaces through the use of heat and pressure.
The ink becomes part of the coating rather than sitting on top.
This method handles full-color designs well and resists scratching significantly better than UV printing. The trade-off is that you need a powder-coated base to start.
Powder Coating With Laser Etching
Laser etching removes the coating to reveal the base metal underneath. It creates permanent designs that cannot be peeled or scratched off.
The design is literally carved into the surface. Color options limit to the contrast between coating and base metal.
You're working with one or two-tone designs rather than full-color graphics. For buyers who prioritize longevity over color range, this delivers the most durable result possible.
Artwork Sealed Under Epoxy Resin
Epoxy sealing places stickers or printed designs under a clear resin layer. This protects the artwork from wear.
It works on wood, metal, and polymer bases. Success depends entirely on application technique.
Properly mixed and cured epoxy creates a glass-hard protective shell. Rushed mixing or inadequate cure time leaves you with a sticky mess that never hardens.
Production Timeline Realities
Standard timelines run three weeks from design approval through delivery. That breaks down to 1-2 days for design approval, depending on how many revision rounds you need.
Production runs 10-14 days for printing and finishing. Shipping adds 3-5 days.
Rush options exist, but cost significantly more because they disrupt normal production schedules.
Makers working at home report multi-day processes between resin pours, sanding, and curing.
File Prep That Actually Works the First Time
File requirements vary by customization method. Getting this wrong means delays or unusable prints.
Files for Laser Etching
Laser etching requires vector files in AI, EPS, or SVG formats. The laser follows paths rather than reading pixels.
Raster images won't work without conversion, which often loses detail. Fine details below 1mm in width won't render clearly because the laser beam has a physical width.
Files for UV and Sublimation Printing
These methods need high-resolution raster files at 300 DPI minimum. Photos should be sized to the final print dimensions rather than relying on upscaling.
Upscaling creates pixelation. Color accuracy varies between screen display and physical prints.
Safe Areas and Bleed
Keep important design elements at least 0.25 inches from all edges. Manufacturing tolerances mean edge placement varies slightly.
You don't want critical details getting trimmed. Leave functional space in your design for actual rolling.
A tray covered edge-to-edge in artwork looks impressive. It gives you nowhere to work without covering your design with herb and residue.
What to Check in Your Proof
Verify text is legible at actual size. Don't just check when zoomed in on your screen.
Small fonts that look readable digitally often become unreadable when printed at tray scale. Confirm design placement leaves clear working space.
You need room to break up herb, roll, and move materials around.
Check that high-contrast areas won't cause eye strain during use.
Lip Height and Compartments That Prevent Spills
Function determines whether you actually use your custom tray or it becomes decoration. These measurements matter more than most buyers realize.
Lip Height Trade-Offs
Lip heights typically range from 0.5 to 1 inch. Each end of that spectrum serves different needs.
Lower lips around 0.5 inches make transferring herb in and out easier. You're not reaching over a tall barrier.
They contain spills less effectively. Taller lips near 1 inch secure contents much better and prevent herb from escaping during rolling.
The trade-off is that they can interfere with card scraping. They also make cleanup slightly more awkward.
Compartment Depth for Organization
Shallow wells around 0.25-0.5 inches deep work well for papers, tips, and lighters. You want them within reach but separated from your working area.
Deeper sections around 1-inch handle grinders and larger accessories. Some trays include multiple compartment depths for different storage needs.
Lap Stability Features
Non-slip backing using rubber or cork grips on surfaces. This prevents the tray from sliding when you're rolling on your lap or a smooth table.
Weight distribution matters too. A well-balanced tray stays level during use rather than tipping when you reach for items on one side.
Lighter trays under 4 ounces shift too easily during normal use. Heavier trays, around 8-12 ounces, provide stability without becoming cumbersome.
Standard Size Options
5x8-inch trays suit personal rolling with just enough space for papers, herb, and a grinder. They're portable enough to toss in a bag and take to a friend's place.
7x11 inch trays work better for shared sessions where multiple people need access to the rolling space. The extra width prevents crowding when you're passing materials around.
Our Mood Rolling Tray hits this sweet spot for versatile solo or group use. 11x13-inch trays function as full setup stations with room for multiple accessories, stash containers, and a dedicated rolling area.
Finding Legitimate Custom Tray Printers (Not Scams)
The vendor landscape mixes legitimate manufacturers with dropshippers and outright scams.
We're covering verification methods that help you avoid problems before you place an order.
Comparing Major Custom Tray Vendors
MyRollingTray.com and CustomRollingTray.com both offer online customization tools. You upload artwork and preview the final product.
They typically require minimum orders and have lead times of 2-3 weeks for production. Etsy provides access to individual makers who offer handcrafted options with smaller minimums.
Some accept true one-off orders. Quality varies significantly between sellers, so thorough review analysis becomes critical.
Trust Verification Steps
Check how long the domain has been registered. See whether the business information looks complete.
Sites registered within the last few months raise immediate concerns. Privacy shields for ownership details are another red flag.
Read reviews that mention surface texture and longevity specifically. Don't just check shipping speed and customer service.
You want to know whether the finish holds up after a month of use. You don't just need to know whether the tracking number worked.
Verify business contact information includes phone numbers and physical addresses. Avoid sites with just email or contact forms.
Legitimate manufacturers answer phones during business hours. They can discuss production details directly.
Testing With Small Orders
Start with small test orders if the vendor allows them. A five-tray order reveals quality issues before you commit to 100 units.
This prevents potentially losing a significant investment. Some risk is worth it to verify quality.
Why Some Buyers Prefer Local Pickup
Seeing and touching the finish in person before purchasing eliminates anxiety. You avoid ordering sight-unseen from distant vendors.
You can verify that the surface feels smooth. You can check that the coating looks even and the construction seems solid.
Local options are limited in most areas. When available, they let you avoid shipping costs and delays while confirming quality.
Real Costs and Production Timelines
Pricing and timelines vary significantly based on order size and customization complexity. Understanding these ranges helps you budget accurately.
One-Off and Small Order Pricing
Single custom trays range from $35 to 45, depending on size and customization method. Metal with laser etching commands a premium pricing of around $40-50.
It requires specialized equipment and produces the most durable results. UV-printed melamine trays cost less at $30-40 but sacrifice durability.
Bulk Order Economics
Orders of 50+ units drop per-piece costs significantly. You often pay $15-25, depending on customization complexity.
The per-tray price keeps falling as volume increases. Setup costs get distributed across more units.
The catch is upfront investment. 100 trays at $20 each require $2000 before you sell a single piece.
Minimum Order Quantities
Most custom printers set minimums between 50-100 units. Lower quantities don't cover their setup and material costs efficiently.
Finding true one-off producers takes more research. It usually means paying higher per-unit prices.
Some vendors advertise "no minimums" but charge setup fees that make small orders economically impractical. A $100 setup fee on five trays adds $20 to each unit cost.
Three-Week Standard Timeline Breakdown
Design approval typically takes 1-2 days if you respond to proofs quickly. You don't require multiple revision rounds.
Delays here are usually on the buyer side. Production runs 10-14 days for printing, coating, and finishing work.
Rush production can shorten this to 5-7 days. It costs 25-50% more because it disrupts normal scheduling.
Shipping adds 3-5 days for standard ground delivery within the continental US. Express shipping exists but rarely makes sense when you're already waiting two weeks.
Getting That Glass-Smooth Finish Without the Sticky Mess
DIY makers struggle with finish selection because wood finishing advice often contradicts what rolling tray users actually need. We're clarifying the chemistry that determines whether your finish works or fails.
Why Oils Aren't the Answer
Penetrating oils like cutting board oil and mineral oil soak into wood grain. They make the surface feel smooth initially.
They provide zero surface protection against residue adhesion. They don't create a protective barrier.
Cannabis residue sticks directly to oiled wood. Cleaning becomes increasingly difficult as buildup accumulates in the grain.
Film Finishes Create the Protection You Need
Polyurethane, lacquer, and epoxy are film finishes. They create a hardened shell on top of the wood surface.
This barrier prevents residue from penetrating into the grain. It enables easy cleaning.
Two-part epoxy delivers the most durable result with a glass-like appearance. It requires careful application.
Two-Part Epoxy Application Process
Mix resin and hardener in the exact ratios specified by your manufacturer. This is usually 1:1 by volume, measured carefully.
Improper ratios prevent proper curing. They leave you with sticky surfaces that never harden.
Apply thin coats rather than thick pours that trap bubbles. Multiple thin coats totaling 1/8 inch thickness work better than one thick pour of 1/4 inch.
Allow full 72-hour cure time at room temperature between 70-75°F. Colder temperatures slow curing.
They may result in surfaces that feel dry but remain slightly tacky under pressure. Sand between coats with 220-grit or finer sandpaper.
Common Failure Modes to Avoid
Rushing cure time or applying in cold temperatures leads to permanent tackiness. This never resolves.
Once epoxy cures incorrectly, you're sanding it off and starting over. There's no fixing it in place.
Using "food-safe when cured" as your only selection criterion ignores performance factors. Hardness and heat tolerance matter more for rolling tray use.
Cleaning Methods That Won't Ruin the Finish
Matching your cleaning approach to your tray's material and finish prevents damage. Different surfaces require different care.
Metal Tray Cleaning
Powder-coated metal tolerates isopropyl alcohol cleaning without damage. Residue removal becomes straightforward.
Soak a cloth in 70-90% isopropyl alcohol and wipe down the surface. Residue dissolves readily.
Avoid abrasive scrubbing pads that can scratch powder coating. Soft cloths or non-scratch sponges remove residue without damaging the finish.
Need help keeping your other accessories clean? Check out our guide on how to clean and maintain your grinder for optimal performance.
Polymer and UV-Printed Surface Care
These surfaces need mild dish soap and warm water. Harsh solvents can cloud or damage the material.
UV prints are particularly vulnerable to aggressive cleaning. This accelerates wear.
Skip acetone and strong solvents entirely on polymer trays. They can soften or craze the plastic.
Sticky Residue Removal Techniques
Soak stubborn residue in warm water for 5-10 minutes to soften the buildup. Do this before attempting removal.
This prevents the need for aggressive scraping. Aggressive scraping risks surface damage.
Use plastic scrapers rather than metal tools that gouge surfaces. Credit cards work perfectly without leaving marks.
Maintenance Schedule for Longevity
Daily quick wipes after use prevent residue buildup. This becomes harder to remove over time.
A 30-second wipe down while putting away other materials saves effort later. Weekly deep cleaning keeps surfaces performing optimally.
Fifteen minutes of thorough cleaning weekly beats hour-long scrubbing sessions monthly. This prevents the gradual stickiness that makes trays unpleasant to use.
Complete Sets and Gift Combinations
Pairing your custom tray with complementary accessories creates a cohesive setup that enhances the whole cannabis experience.
Matching materials and finishes across pieces delivers both aesthetic appeal and functional benefits.
Material and Finish Consistency
Powder-coated metal trays pair naturally with aluminum grinders and airtight metal storage containers.
The consistent material feel and similar weight distribution create a unified aesthetic.
Wood trays with proper finishing work well alongside wooden stash boxes and cork-based accessories for buyers who prefer natural materials.
Mixing metal and wood can work, but it requires intentional color and finish coordination.
Gift Pairing Strategies
A custom tray featuring the recipient's favorite artwork becomes significantly more meaningful when you pair it with premium cannabis flower or concentrates for immediate enjoyment.
The tray provides lasting value while the cannabis creates memorable shared experiences.
Pre-rolls paired with a personalized tray create a complete, ready-to-use gift that shows thoughtfulness beyond generic accessories.
Building Complete Setups
A functional complete setup includes the tray as the foundation, a quality grinder for consistency, airtight storage to maintain freshness, and a proper lighter or hemp wick for ignition.
Buying these pieces together ensures compatibility and creates a cohesive organization.
Start with our Mood Rolling Tray as your foundation and add our hemp-derived cannabis products to complete the experience.
Having everything you need in one place enhances the complete setup and eliminates the frustration of missing key components.
Order Your Perfect Tray Today
You now have the framework for making a confident purchase decision. The process comes down to four clear steps that eliminate guesswork.
Step One: Choose Your Base Material
Base your decision on durability needs and budget. Metal delivers longevity and requires minimal maintenance.
Melamine offers cost savings with durability trade-offs. Wood provides natural aesthetics but demands proper finishing knowledge.
Step Two: Select Your Customization Method
Match your artwork type and expected wear. Laser etching creates permanent graphics that never peel.
Sublimation delivers full-color durability. UV printing provides photo-quality detail with shorter lifespan expectations.
Step Three: Verify Seller Legitimacy
Use review analysis focusing on surface feel and longevity mentions. Check business information completeness.
Consider test orders before large commitments. These verification steps prevent the frustration of dealing with scam vendors or receiving substandard products.
Step Four: Prepare Files Properly
Follow the requirements for your chosen method. Review proofs carefully before approval.
Getting this right the first time avoids delays. It ensures your vision translates accurately to the physical product.
Ready to Skip the Custom Order Wait?
Our Mood Rolling Tray delivers everything this guide recommends. You get metal construction for years of durability.
The durable finish won't scratch or peel. It's the optimal size for solo or group use.
It ships immediately instead of the three-week custom timeline. Pair it with our hemp-derived cannabis products for the complete experience.
For Custom Artwork Needs
Metal trays with powder coating and laser etching at $40-60 remain the proven default. This combination delivers the durability, appearance, and longevity that define successful rolling tray purchases.
You're now equipped to avoid the UV prints that scratch within a month. You can avoid epoxy finishes that stay tacky from rushed curing.
Purchase with confidence knowing exactly what performance to expect from your investment.